Most people attack closet organization backwards. They buy bins, baskets, and drawer dividers before figuring out what the closet actually needs — and end up with a pile of unused organizers on the floor. Here is a method-first approach that costs less and lasts longer.
The First Step Has Nothing to Do With Organizing
Before any shelf goes up or any bin gets labeled: purge. A closet organization project that skips this step is just rearranging clutter. Pull everything out. If you have not worn it in 14 months, it goes. If it does not fit today, it goes. The organizing phase gets dramatically easier when you are working with 60% of your original volume.
No tool, no IKEA PAX insert, no velvet hanger set fixes a closet that holds too much stuff. This is the one step that genuinely cannot be skipped.
Zone Your Closet Before You Buy a Single Thing

Zoning is the difference between a closet that stays organized for six months and one that collapses in three weeks. The concept is simple: group items by use frequency, not by category alone.
Most closets need three zones:
- Daily access zone — eye level, front and center. This is where your go-to work outfits, everyday shoes, and most-worn basics live. Anything you touch more than twice a week belongs here.
- Occasional zone — above eye level or pushed to the sides. Seasonal items, dress clothes you wear monthly, formal shoes.
- Deep storage zone — floor level, back corners, highest shelves. Off-season items, sentimental pieces, anything you access fewer than six times a year.
This matters more than which organizer you buy. A perfectly labeled system with the wrong zone layout will still feel chaotic, because you will be reaching past daily items to get to occasional ones.
How to Map Your Zones
Stand in front of your empty closet. Measure the height from floor to the top rod or shelf. Eye level for most adults is 60–66 inches. Everything between 48 and 72 inches is prime real estate. Sketch this out — literally draw a rectangle and mark your zones with a pencil before buying anything.
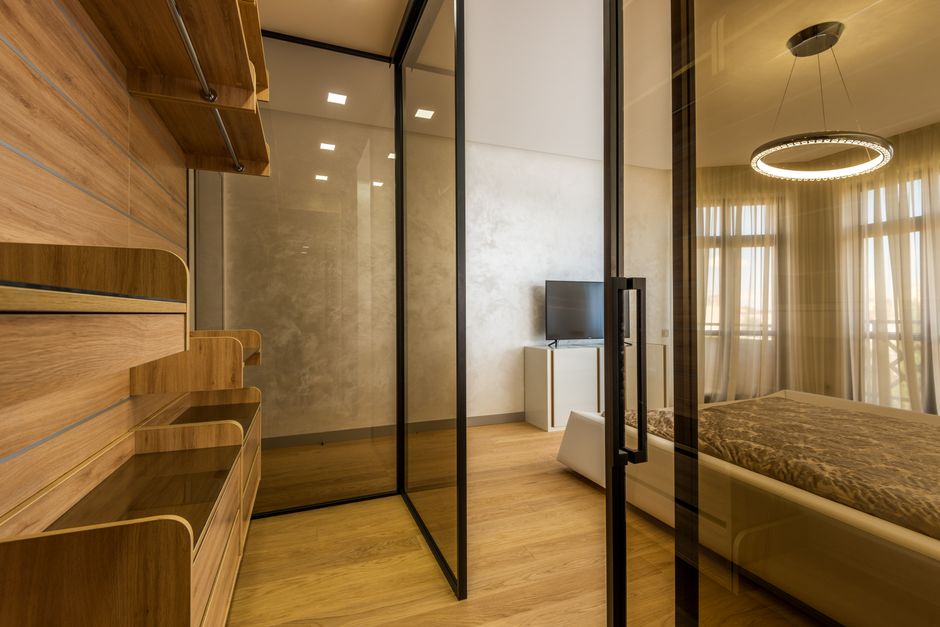
A standard reach-in closet is typically 24 inches deep and 60–72 inches wide. A walk-in is usually 5×7 feet or larger. These dimensions determine which DIY solutions are even possible.
The Hanging vs Folding Decision
Most people over-hang. Folding takes up significantly less horizontal space than hanging, and many items — t-shirts, jeans, knitwear — are better stored folded anyway.
A rough guideline: hang anything that wrinkles badly when folded (structured blazers, dress shirts, trousers). Fold everything else. If you shift from 80% hanging to a 50/50 split, you free up enough rod space to double your hanging sections with simple DIY rod extenders. The Container Store sells a chrome double hang rod extender for about $15 that drops a second rod below an existing one — instant double the capacity for dress shirts and cropped jackets.
Accessories Deserve Their Own Zone
Belts, scarves, and bags are the items most likely to get shoved into whatever space is left over. That is why they go missing. Designate a single hook row or drawer unit for accessories before anything else is placed. SONGMICS bamboo shelf dividers ($18 for a 6-pack) create fast, no-drill sections on any existing shelf and work particularly well for bags standing upright.
DIY Rod and Shelf Systems by Closet Type
Here is where most of the budget decisions happen. The comparison below covers the five most practical DIY approaches, with real costs and real limitations.
| System | Best For | Avg. Cost (reach-in) | DIY Difficulty | Longevity |
|---|---|---|---|---|
| ClosetMaid Wire Shelving | Rental apartments, humid climates | $40–$90 | Low (brackets + screws) | 10+ years |
| IKEA KALLAX + freestanding rod | Walk-ins, no drilling required | $150–$300 | Medium (flat-pack assembly) | 5–8 years |
| Custom plywood shelving | Permanent homes, maximum customization | $80–$200 in materials | High (circular saw, stud finder) | 20+ years |
| Tension rod + over-door organizer | Small closets, zero holes | $20–$50 | None | 2–4 years |
| IKEA PAX wardrobe inserts | Walk-ins replacing built-ins | $300–$700 | Medium-High | 10+ years |
ClosetMaid Wire Shelving: The Underrated Option
ClosetMaid wire shelving (available at Home Depot for around $1.50 per linear foot) is not glamorous, but it is genuinely functional. Wire shelves allow airflow, which matters more than people think — shoes and bags stored on solid shelves can develop musty smells over time. The ClosetMaid 5-Foot Wire Shelf Kit runs about $25 and includes all mounting hardware. Installation takes under an hour with a stud finder and a drill.
The main limitation: wire shelves are not ideal for small folded items that fall through the gaps. A $5 shelf liner from any hardware store solves this completely.
IKEA PAX: When DIY Means Configuring, Not Building
The IKEA PAX wardrobe system is not pure DIY, but it IS the best option for walk-in closets where you want a built-in look without custom carpentry. A basic 39-inch PAX frame starts at $130. Add pull-out trouser hangers ($35), shoe shelves ($20 each), and soft-close drawers ($60–$100), and a full walk-in configuration typically runs $300–$700. The PAX configurator on IKEA’s website lets you plan the entire layout before spending anything.
What Everything Actually Costs: A Real Budget Breakdown
The organizing industry loves to suggest you need $500+ for a proper system. You don’t. Here is what a complete reach-in closet makeover actually costs using DIY methods.
| Item | Product Example | Cost |
|---|---|---|
| Wire shelving (6 feet) | ClosetMaid Wire Shelf Kit | $25–$40 |
| Double hang rod extender | The Container Store Chrome Extender | $15 |
| Velvet hangers (50-pack) | ZOBER Slim Velvet Hangers | $15–$20 |
| Shelf dividers (6-pack) | SONGMICS Bamboo Shelf Dividers | $18–$25 |
| Over-door shoe organizer | SimpleHouseware 24-Pocket Organizer | $12–$18 |
| Stackable clear bins (4-pack) | IRIS USA Weathertight Storage Box | $25–$35 |
| Label maker | DYMO LabelManager 160 | $20 |
| Total | $130–$173 |
A professional closet company like California Closets charges $1,200–$3,000 for the same square footage. The DIY version does 85% of the same job at roughly 10% of the cost. That gap is hard to justify unless you are in one of the edge cases covered at the end of this article.
The Mistakes That Derail Every DIY Closet Project
- Buying bins before measuring. The number one waste of money. A bin that is 2 inches too wide for your shelf is worthless. Measure every shelf — height, depth, and width — before purchasing a single container.
- Organizing without purging first. Already covered, but worth repeating. You cannot organize your way out of owning too much.
- Making the system too complicated. A closet that requires 12 steps to put away a sweater will not stay organized. If the system is hard to use, you will stop using it within a month. Simple beats perfect every time.
- Ignoring the floor. The closet floor becomes a dumping ground when there is no planned use for it. Install a shoe rack — the AmazonBasics Adjustable Bamboo Shoe Rack costs about $35 — or designate the floor for specific labeled bins. Unplanned floor space turns into chaos.
- Using opaque containers for everything. You cannot see what is in them. Either go fully clear (IRIS USA, Sterilite) or label everything with a DYMO label maker. Non-labeled opaque bins guarantee you stop using the system within two months.
- Skipping the stud finder. Shelving screwed into drywall only — not studs — will pull out under weight. A Stanley Fatmax stud finder costs $15 and prevents shelves from collapsing under a stack of jeans. This is not optional.
Small Reach-In vs Walk-In: Different Problems, Different Fixes
My reach-in closet is only 24 inches wide. What actually helps?
Vertical space is your only resource in a narrow closet. Install a double hang rod — one at standard height (66 inches) for long items like dresses, one lower (around 40 inches) for shirts. Add an over-door organizer for shoes and small accessories; the SimpleHouseware 24-pocket version fits most standard doors and runs about $15.
Switch from plastic hangers to slim velvet ones. ZOBER 50-pack goes for $18 and reclaims roughly 30% more rod space than standard plastic. For a 24-inch reach-in, spending more than $100 total on solutions is rarely necessary.
My walk-in has too much open space and nothing makes sense
Open space in a walk-in sounds like a luxury, but it fills with chaos fast without structure. The fix here is a freestanding unit rather than wall-mounted shelving. The IKEA KALLAX 4×4 shelf unit ($140) creates instant drawer-and-display storage without drilling. Pair it with a freestanding clothing rack — the SONGMICS Industrial Clothes Rack runs about $45 — to create a defined hanging zone for your most-worn items.
Walk-ins respond well to category islands: one zone for hanging, one for shoes, one for folded items, one for bags and accessories. Label every zone during setup, even temporarily with masking tape and a marker. The labeling forces deliberate placement before habits form.
What about a shared closet where two people have different systems?
Divide the rod down the middle and treat each half as a separate closet. Do not share zones. The bigger issue in shared closets is usually that one person is using more than their allocated half — measuring each side before organizing forces that negotiation upfront instead of mid-project.
Two separate IKEA PAX towers with individual configurations is the cleanest solution for a shared walk-in, running about $300–$400 total versus $700+ for a custom built-in serving two people with different storage needs.
When to Stop DIYing and Buy a System Instead
DIY closet organization works for most situations. But three scenarios exist where a professional system — or a carpenter — is the smarter financial call.
Irregular walls, sloped ceilings, or awkward angled corners fight wire shelving and IKEA units rather than working with them. The elfa system from The Container Store (starting around $200 for a basic reach-in, and discounted 30% off several times a year) handles non-standard closets far better than any off-the-shelf DIY approach because it mounts on a single wall-hung rail that adjusts to any width.
If you are preparing to sell a home, a well-installed built-in closet system adds real perceived value during showings. Spending $800–$1,500 on a professional install can return more than it costs in that specific context.
And if you have genuinely attempted two or three rounds of DIY organization and the closet reverts to chaos within weeks — the problem is not the products. It is the system design or the habits around it. A professional organizer consultation (typically $150–$300 for a single session) addresses the behavioral patterns that no bin or shelf resolves on its own.
Most people, though, do not fall into any of these categories. A weekend, a stud finder, a ClosetMaid shelf kit, and 50 velvet hangers will solve the problem the same person has been putting off for two years.
This article does not constitute financial or professional design advice. Product prices reflect approximate 2026 retail averages and may vary by retailer.
Related Posts

Black Skinny Jeans Dinner Outfit: Mastering the Art of Home Espresso: A Complete Guide
For many coffee lovers, the allure of a perfectly pulled…

Best Nursing Romper Options for Style and Easy Breastfeeding Access 2024
A breastfeeding mother can burn up to 500 calories a…
